Post by Admin on Apr 3, 2020 10:00:49 GMT
*Step1.
Get in your computer the old 5CC tool made by Mafi. You can find it here. firefoxccmods.com/wp/download/close-combat-5cc-tool/ and uncompress in one folder from your computer it.
*Step2.
Open the tool by double click in the 5CC v1.22 (W2K-W7).exe inside 5CC_for_WinXP-W7 folder if your O.S is Windows. There is another for MAC users.
*Step3.
Open a TXT map file from a older CC game clicking here.
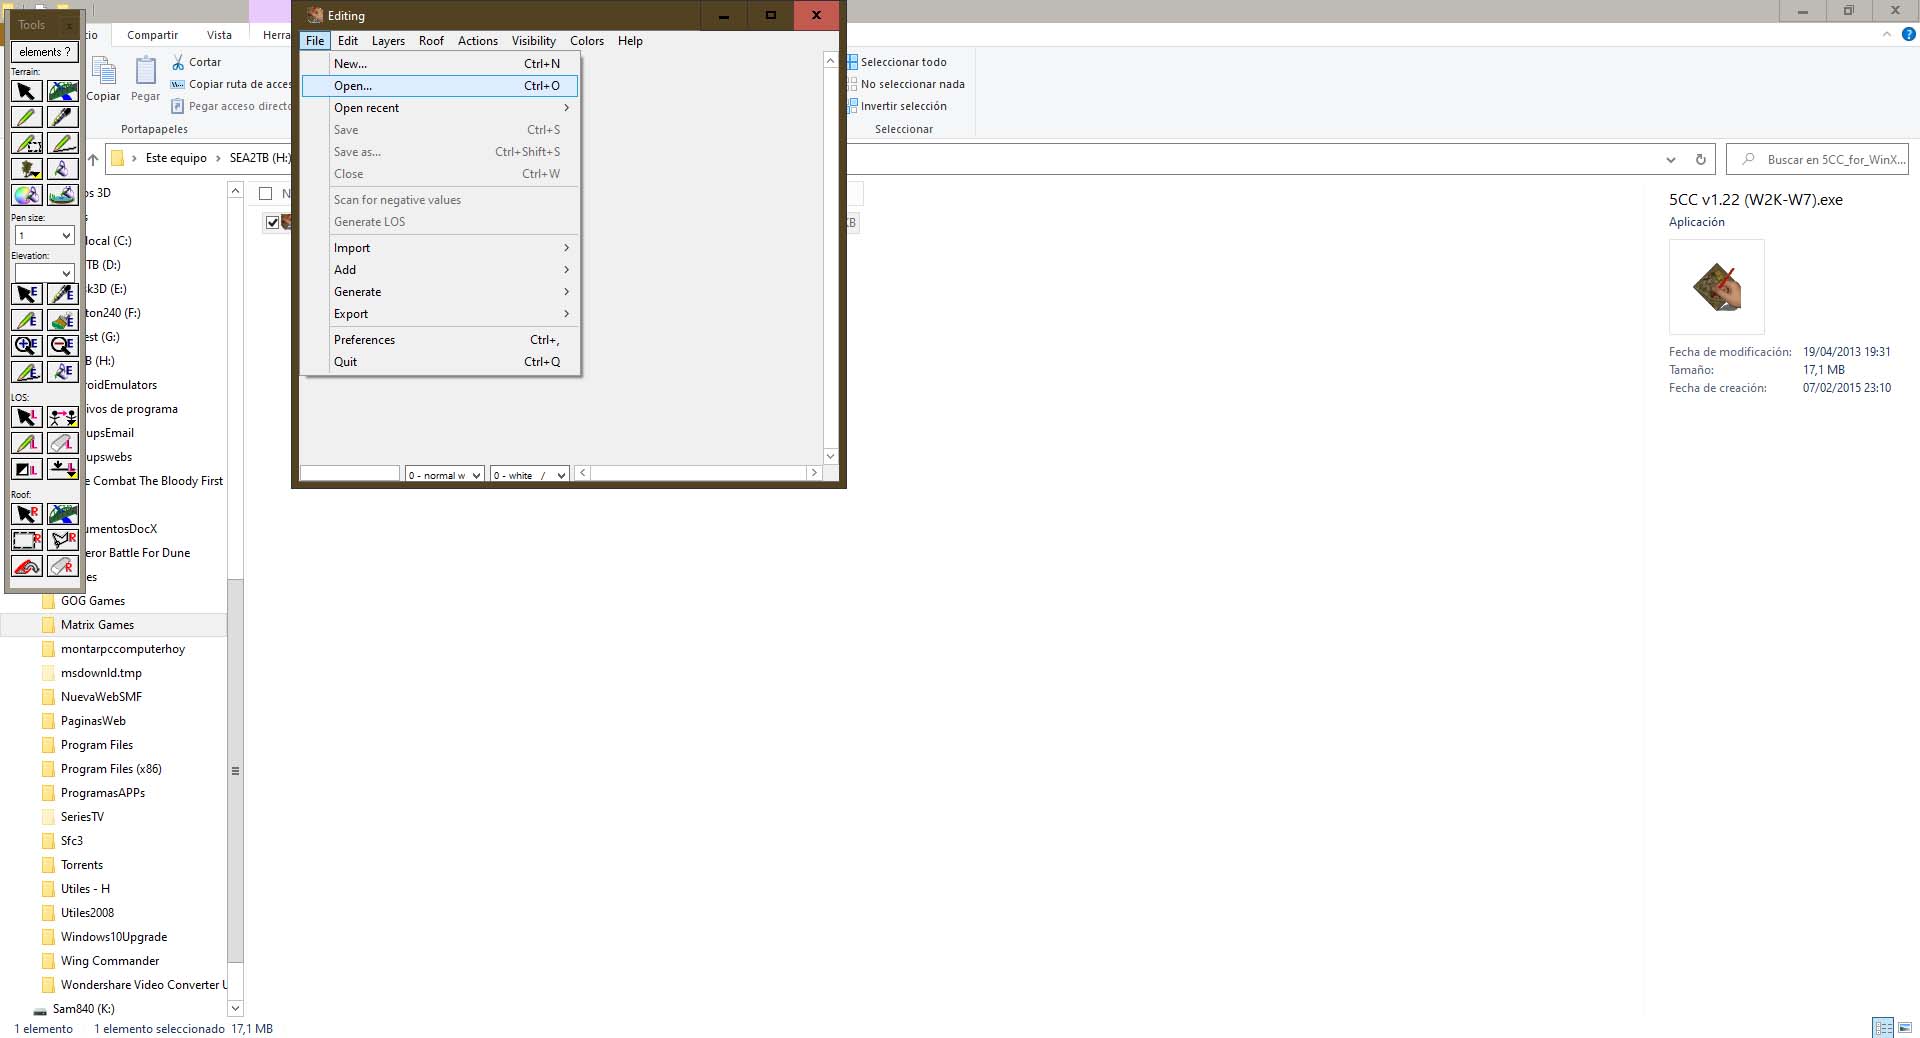
*Step4.
With the map opened in 5CC select the export background picture option.
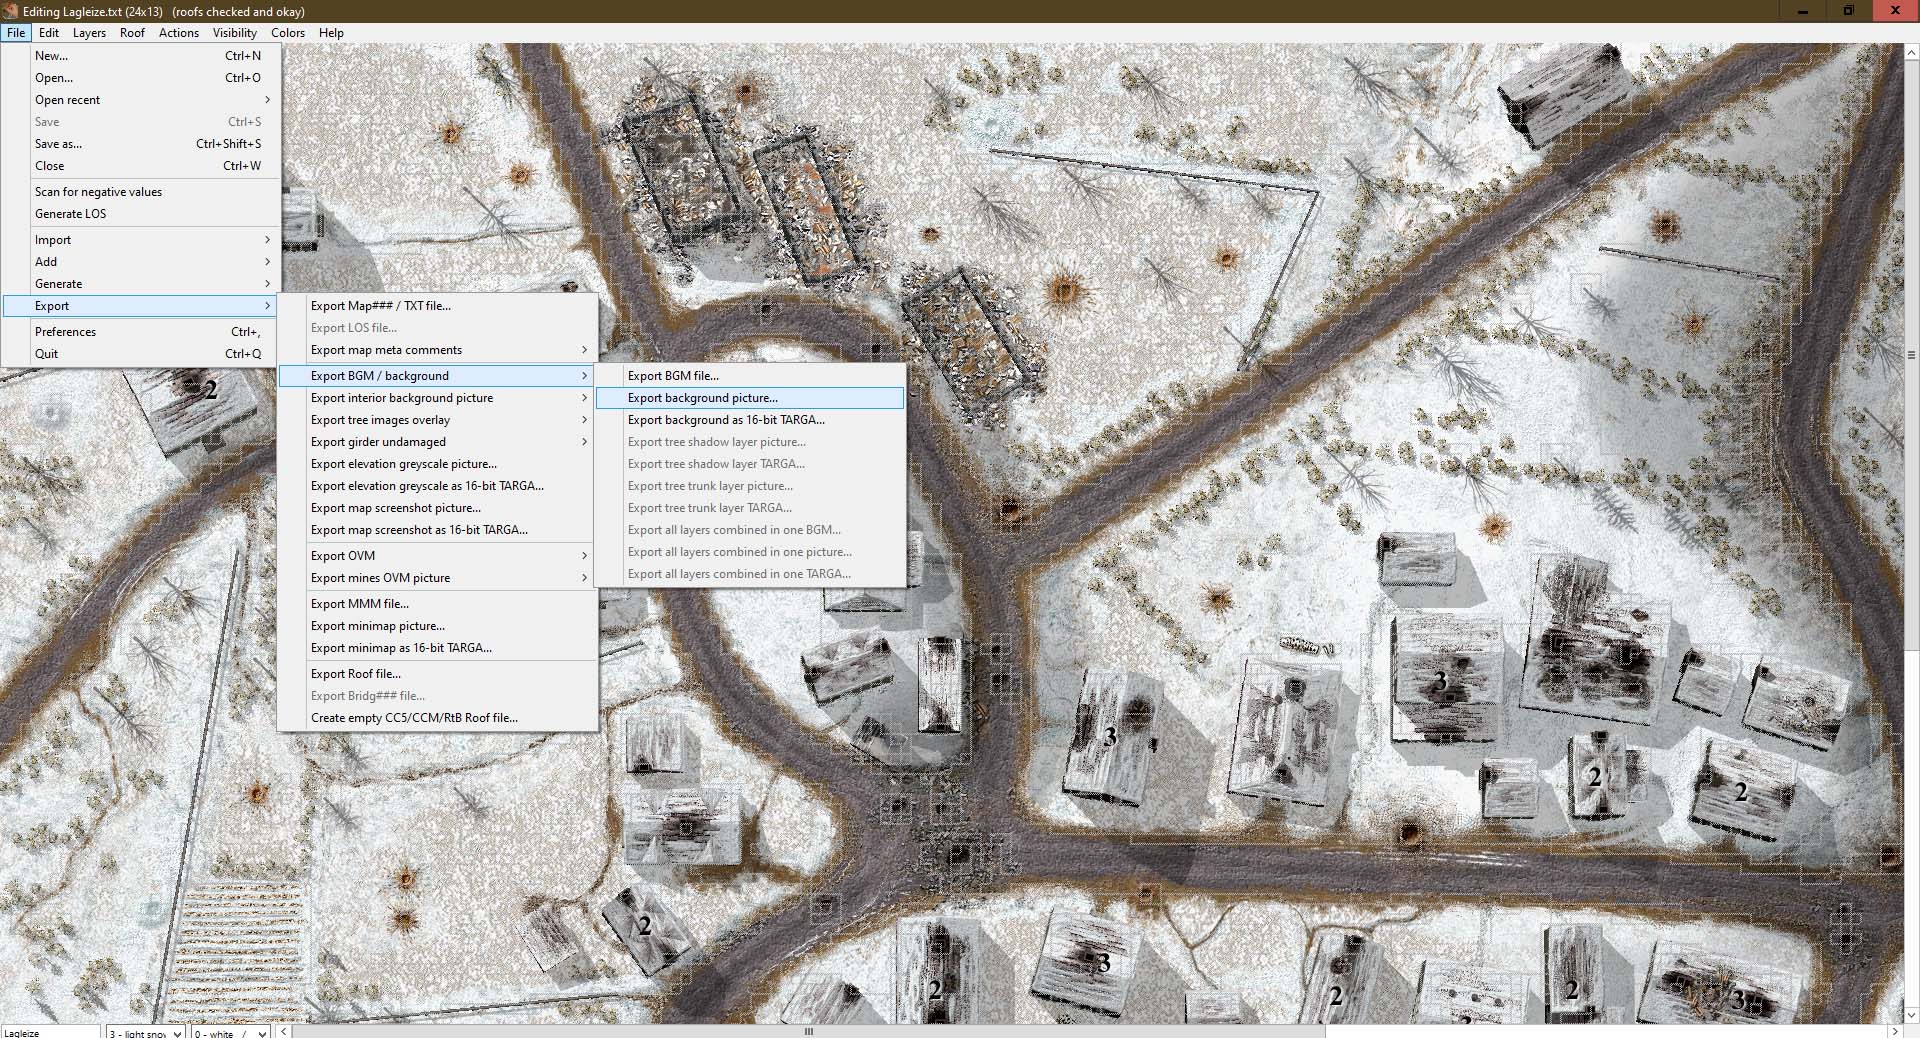
It will let you save a bmp image from the background.
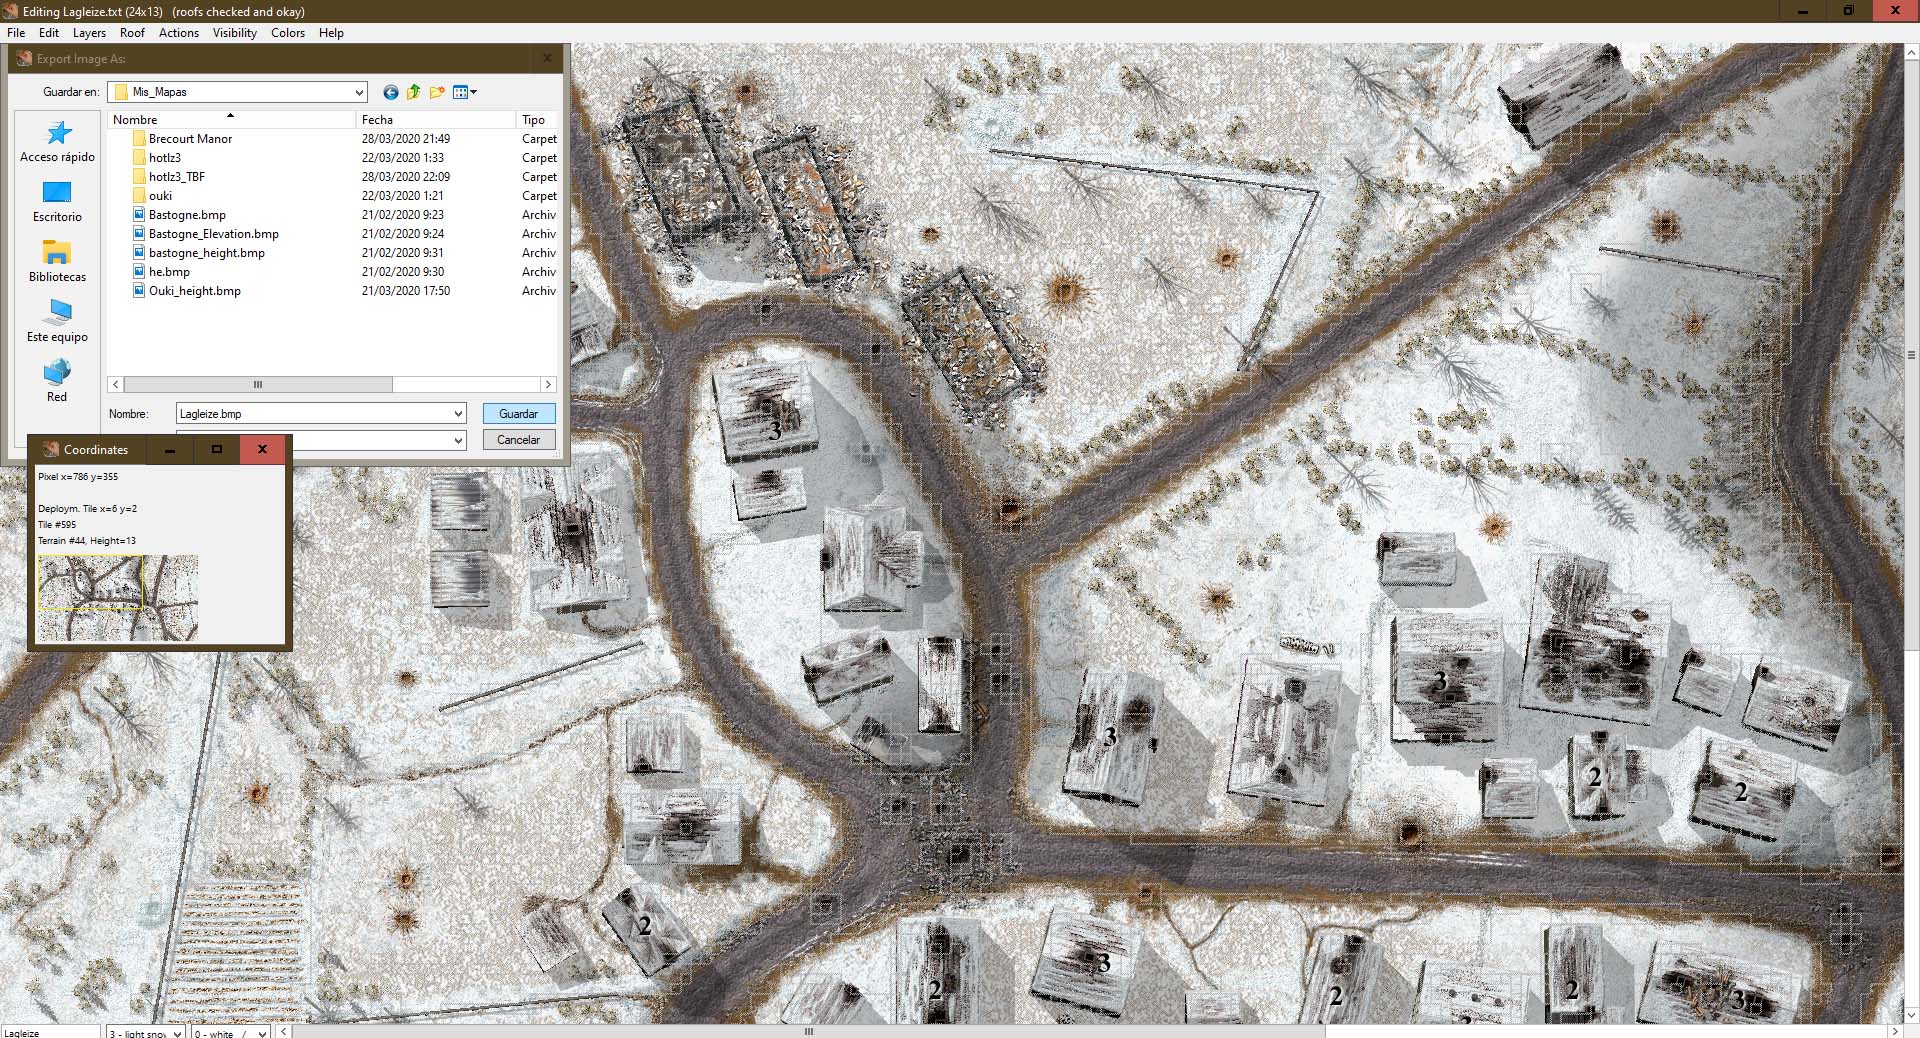
*Step5.
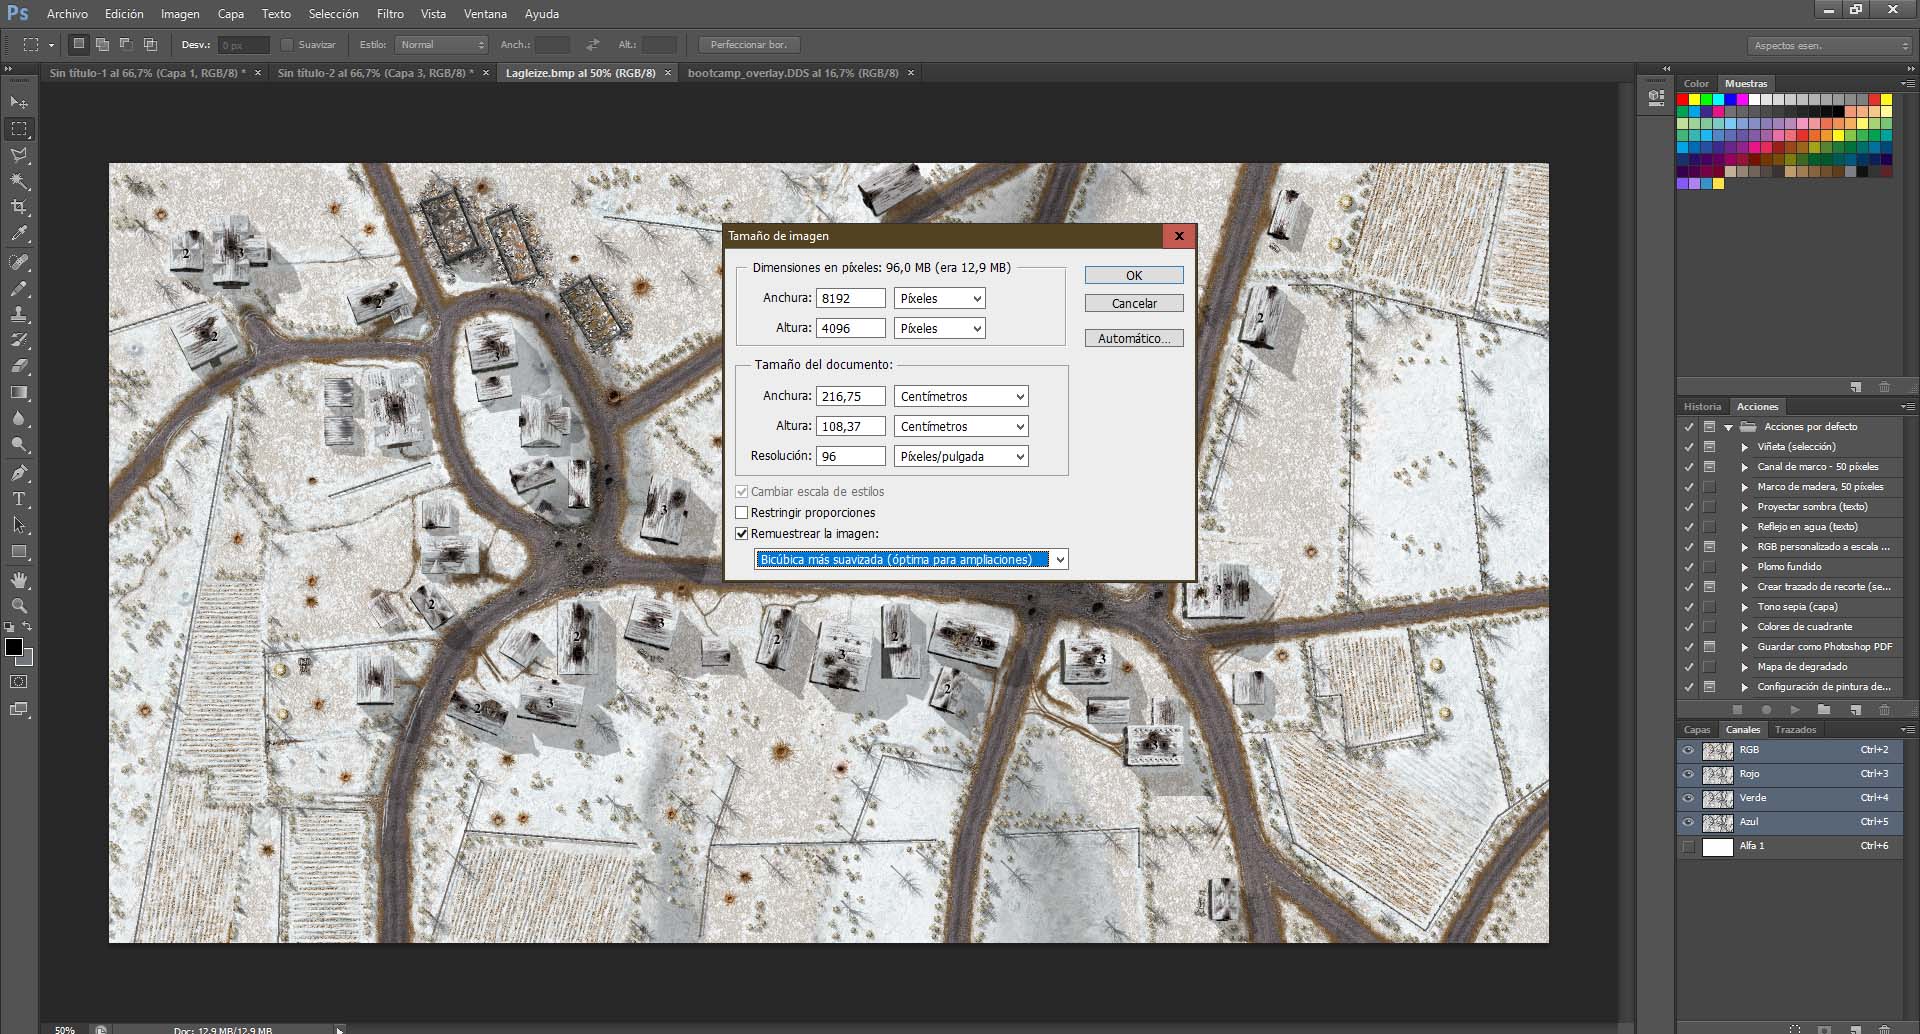
Open the bmp image from the background with photoshop. Now because the background scale in TBF is different, you must rescale the background image. Yes, increasing the size can reduce the quality from a image but these bmp images are not compressed images and it will not be a big lose of quality.
The selection from the size is very important. A map more as a box can be set in a size from 4096x4096. This map background from Lagleize map is more as a rectangle and I go to use a 8192x4096 size.
*Step6.
Next you must save it as a DDS file. You should have installed the Photoshop Nvidia DDS Plugin plugin or any other tool creating DDS image files. There are some tools which they let you to create a dds file from a normal image.
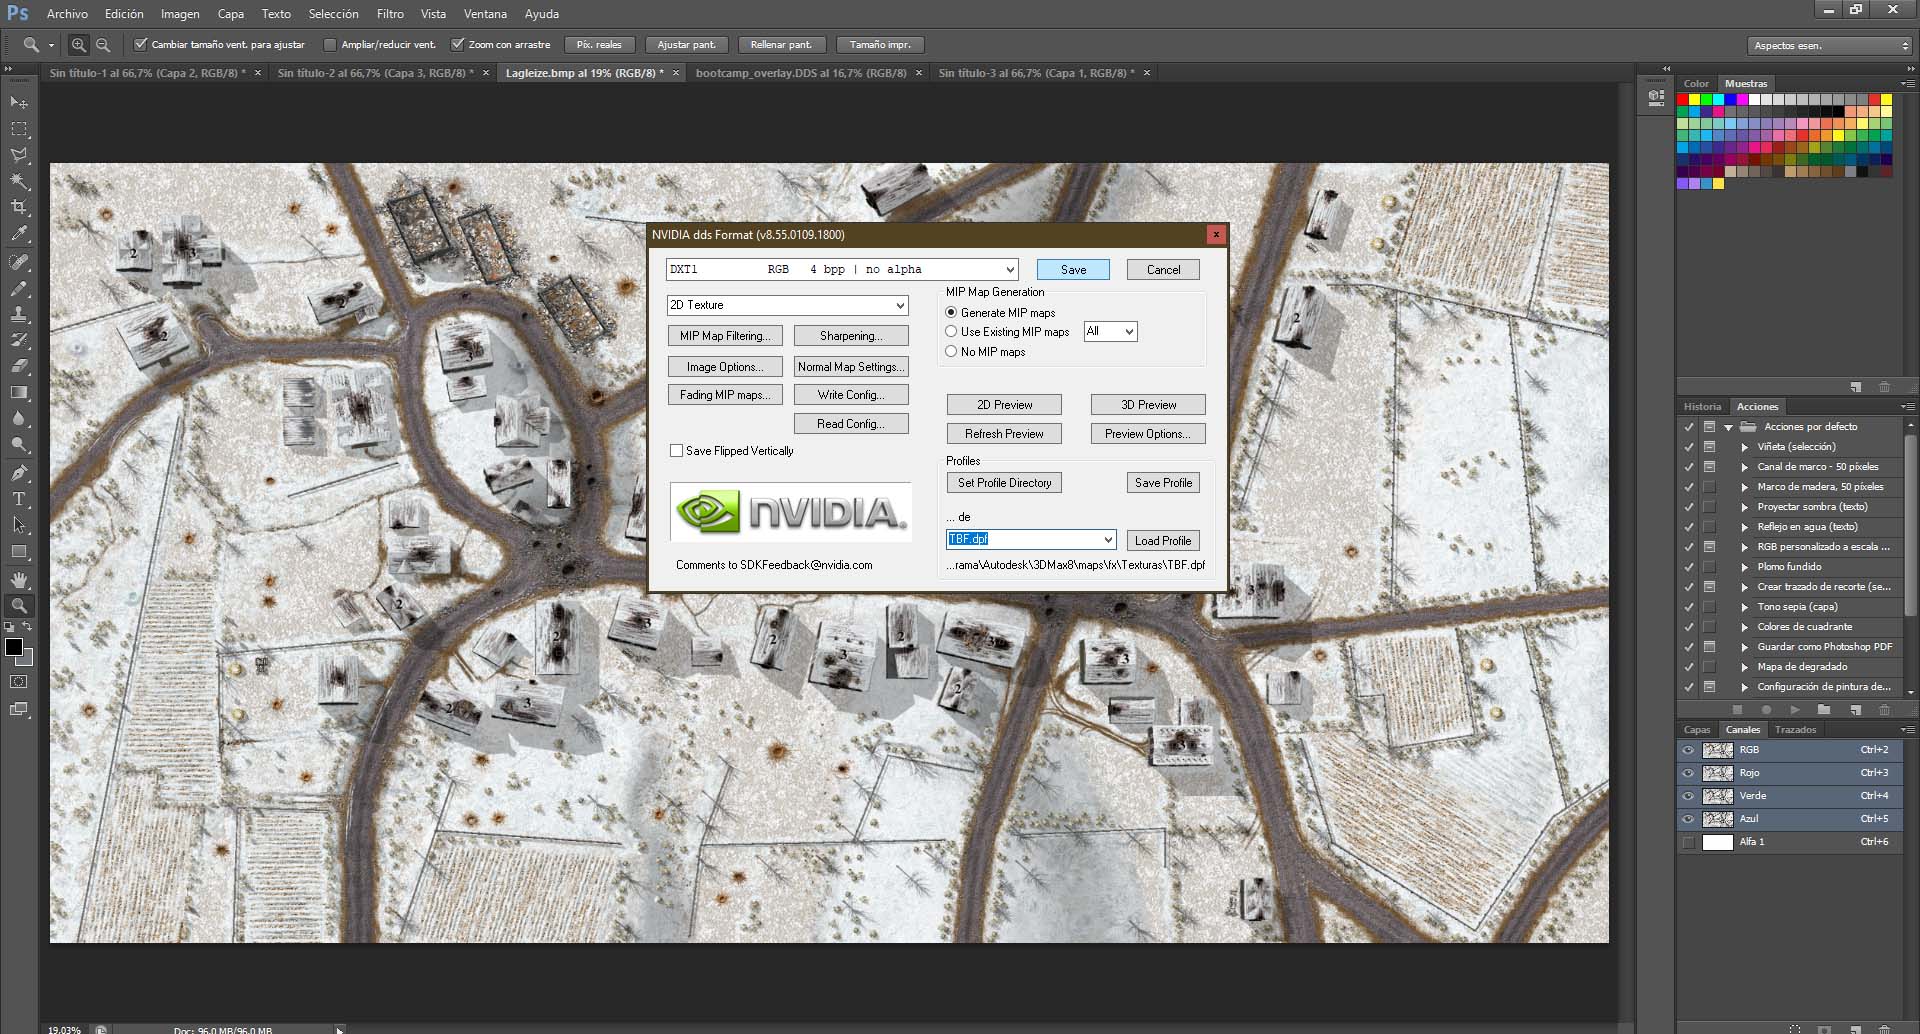
The DDS should be created with the TBF Nvidia DDS profile (check the TBF faq) and being a file from a very high size, it will require some of time saving it.
*Step7.
Again with the 5CC tool, we export the height greyscale image from the original CC map and we can close the 5CC tool because we do not need anymore in this process.
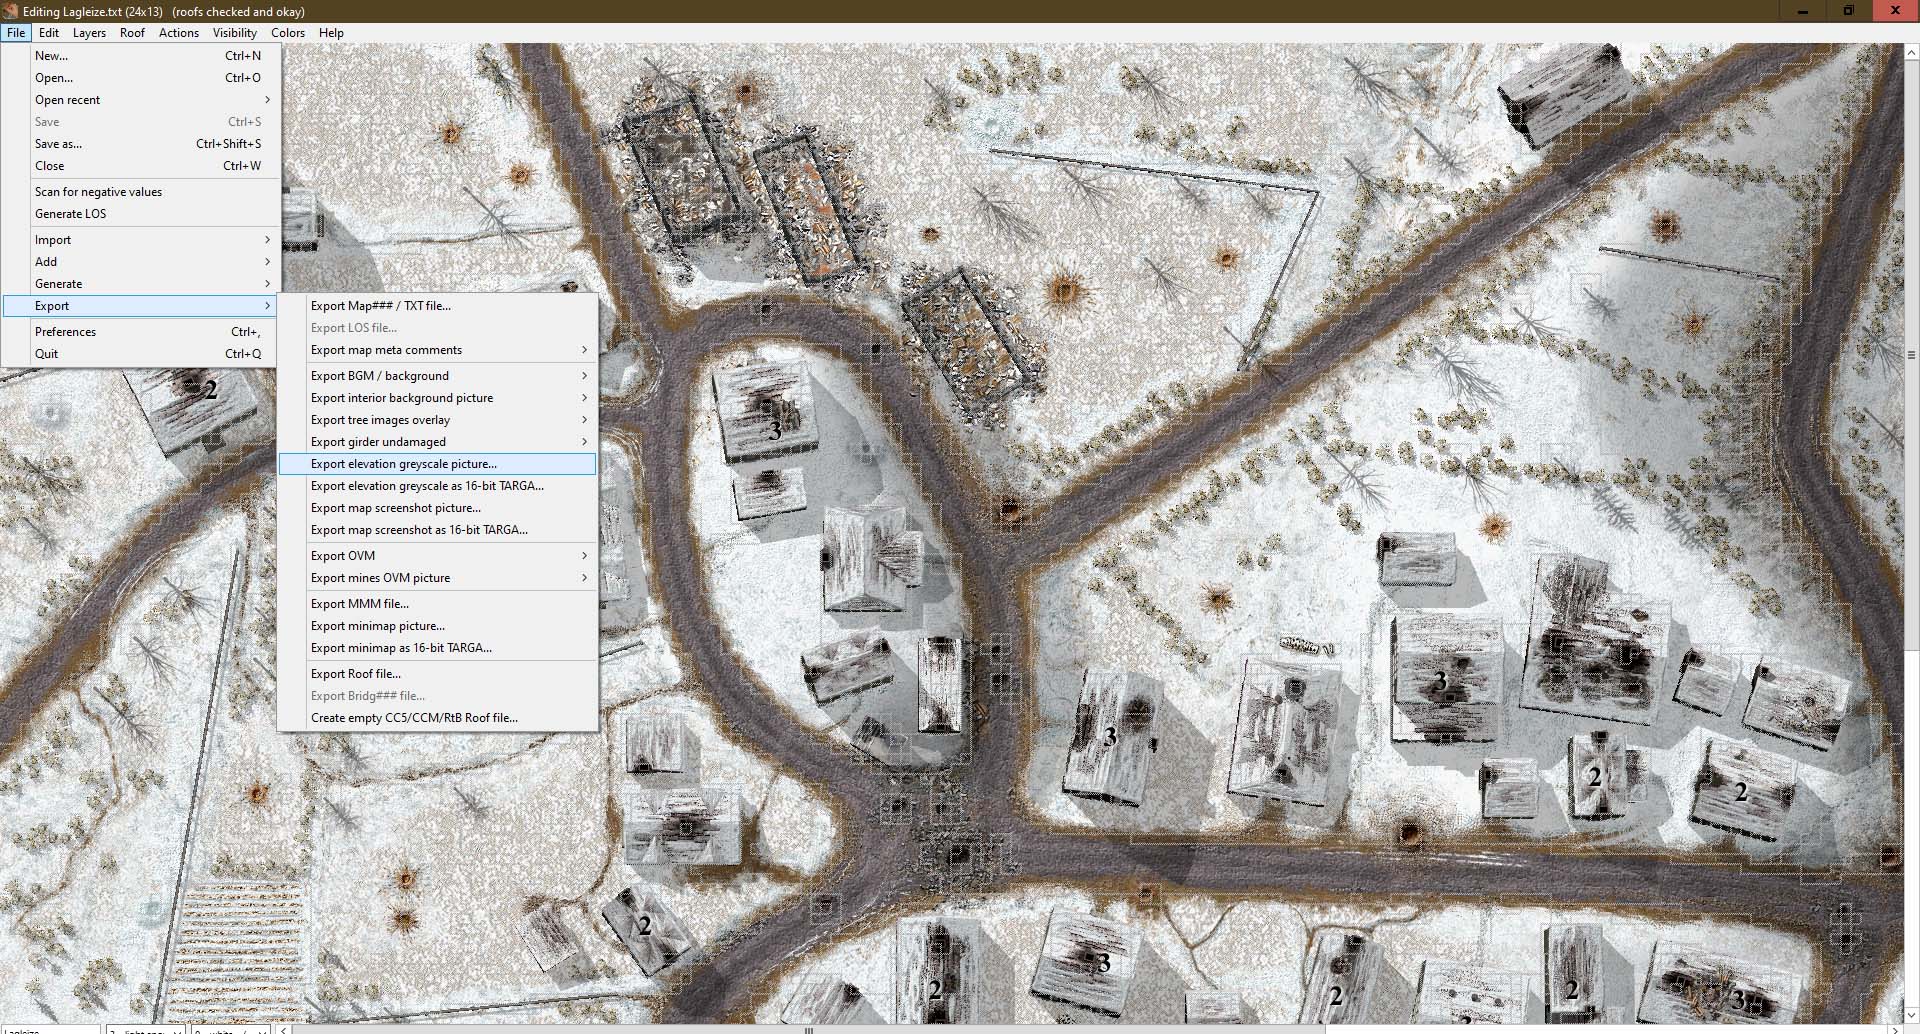
Remember where you saved these image files.
*Step8.
We open the TBF map editor, we will find the link in the launch screen. Inside the map editor, there is a help with some info about keys and with the esc key, we can access the options and change the resolution. Probably you must leave and launch again the map editor if you want change the resolution.
*Step9.
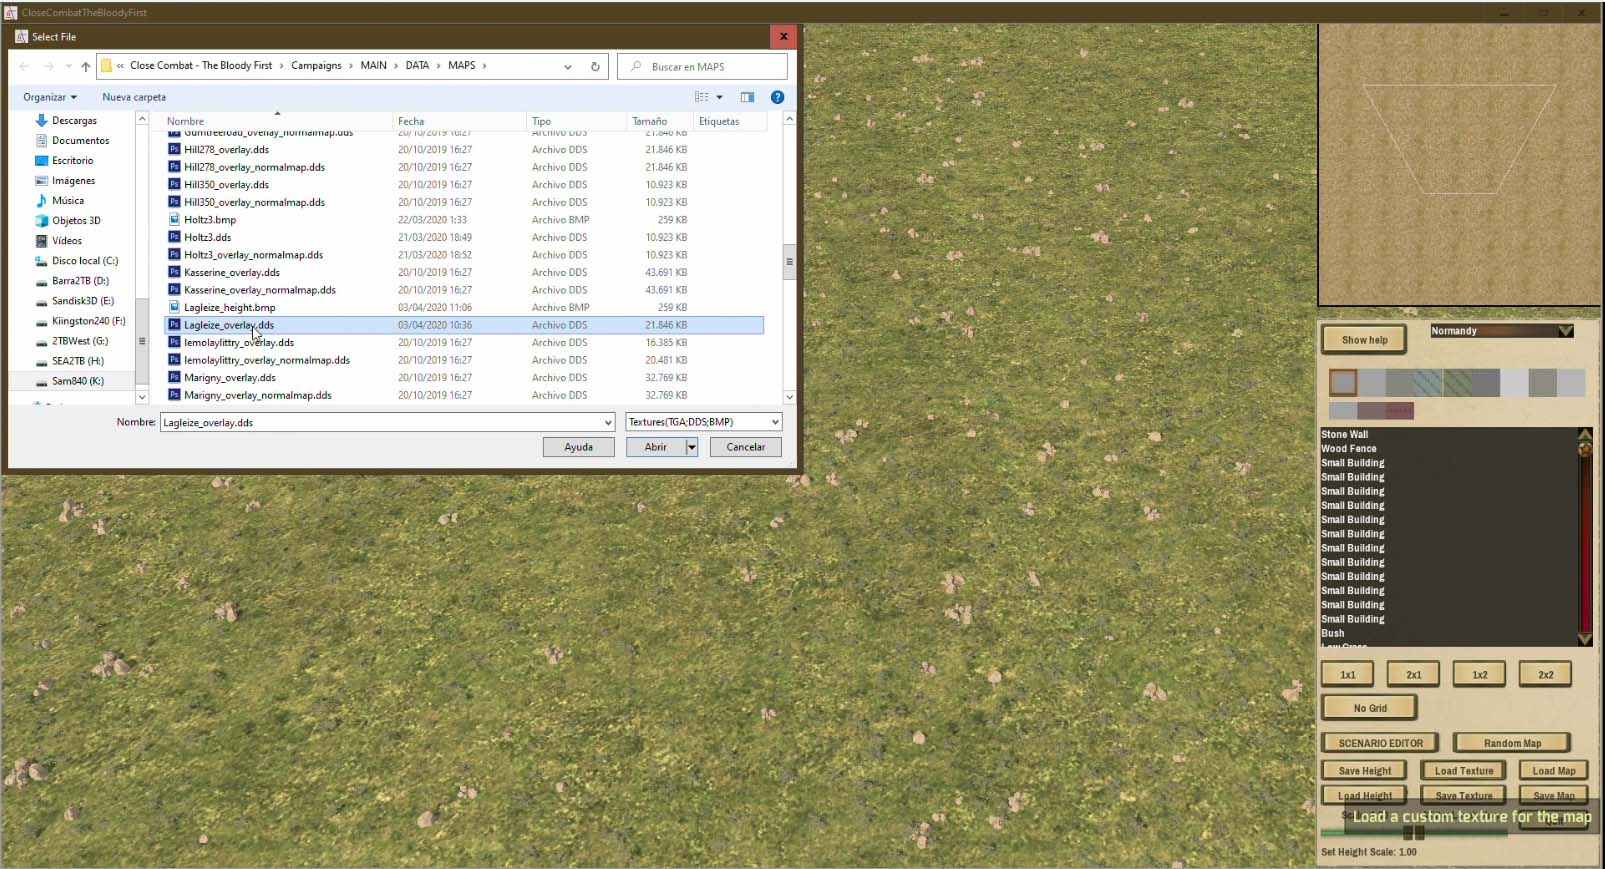
We load our new background image. The preset from tunisia, sicily or normandy affects to things as elevations. I am not sure if it affects to more things, probably yes. The modding help docs.google.com/document/d/1ZjsmoAmFBgiQAC3aCr3J6yhiH6OmbNDljWsiSXX_CSw/edit says this.
While it does not change, the files from the maps must be in the original maps folder ..\Close Combat - The Bloody First\Campaigns\MAIN\DATA\MAPS\.. or the scenario editor and the game will not load them.
*Step10.
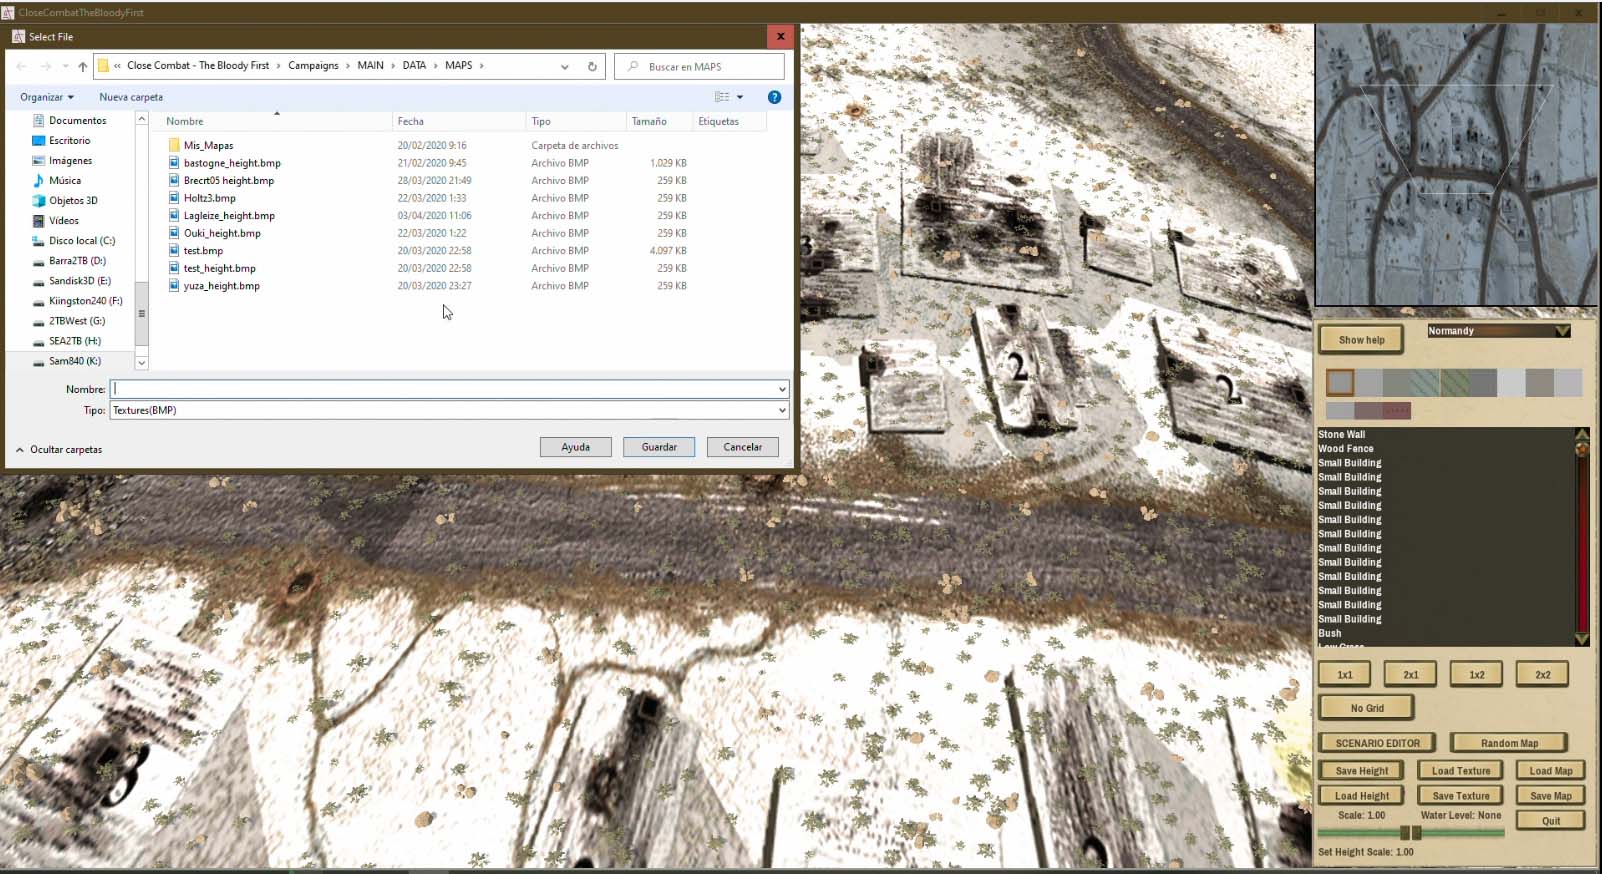
With the background texture loaded inside the map editor. We click in save the height map. By unknown reason for me, the height image has a different size with each map, the unique way where we can know what is the correct size or the easier way, it is create the default empty image. Next we open it in photoshop or other image editor and we check the size. With this map, it is 257x257 pixels. Now we can open the height from the original old CC map and resize to this size. Next we save it as a bmp image 32bits.
*Step11.
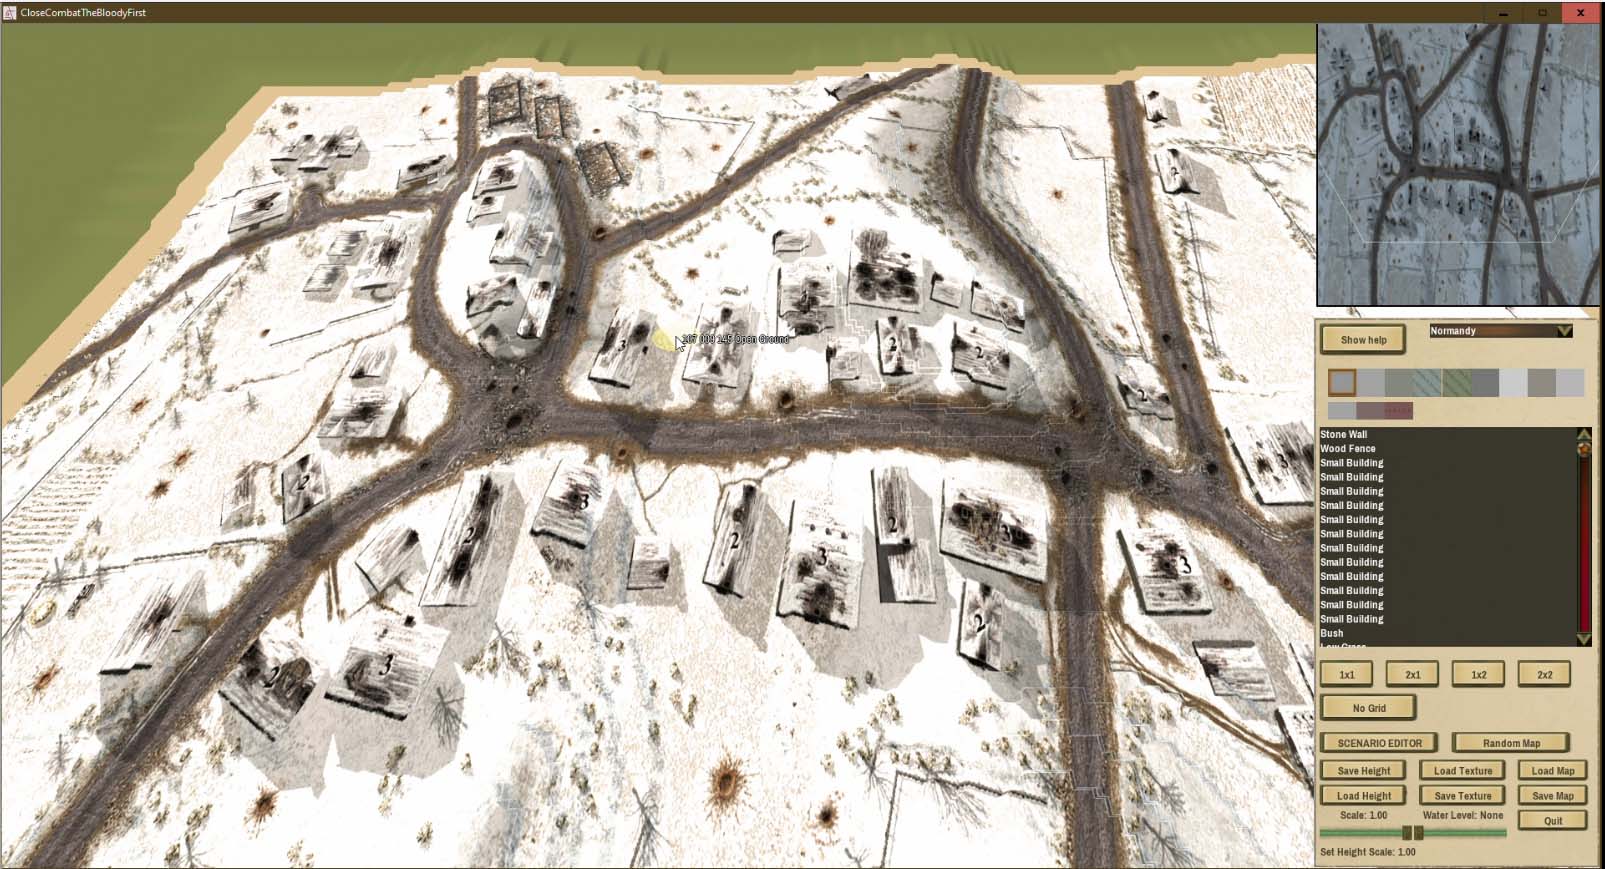
We load the previously saved height image with the map editor. When you make it, you will see some like this. For this map as I said before, I choose the normandy preset because the height settings are better.
*Step12.
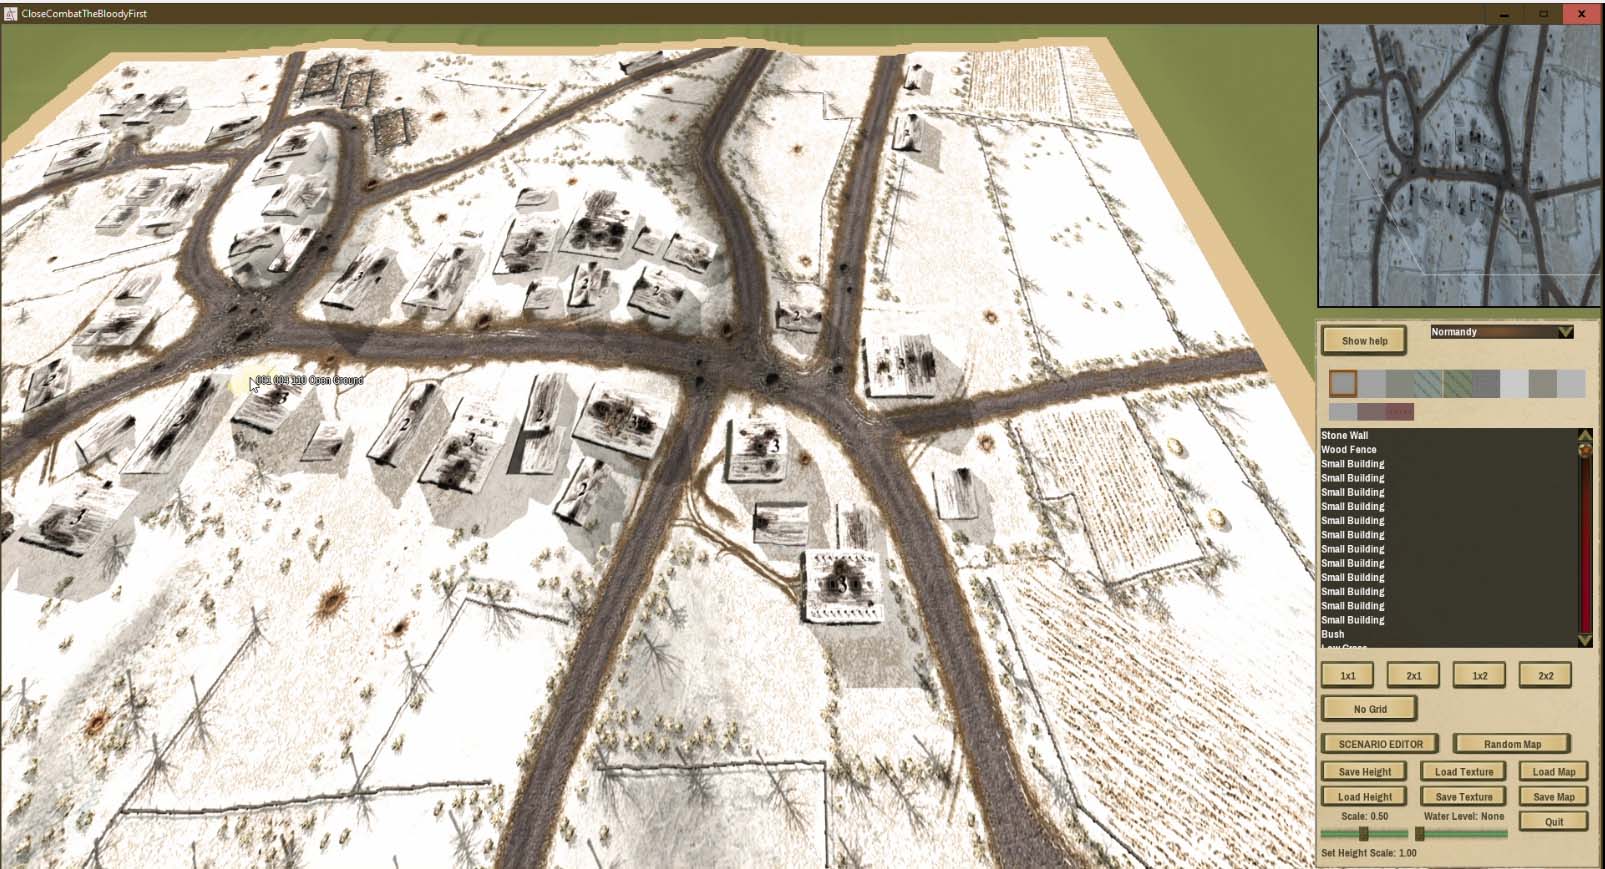
Now I need set a different height scale, I do not need to change the water level because the map has not a river, a lake or other thing. I have choosen a 0.50 level and I load again the height image. It will update the height showing the last selected.
*Step13.
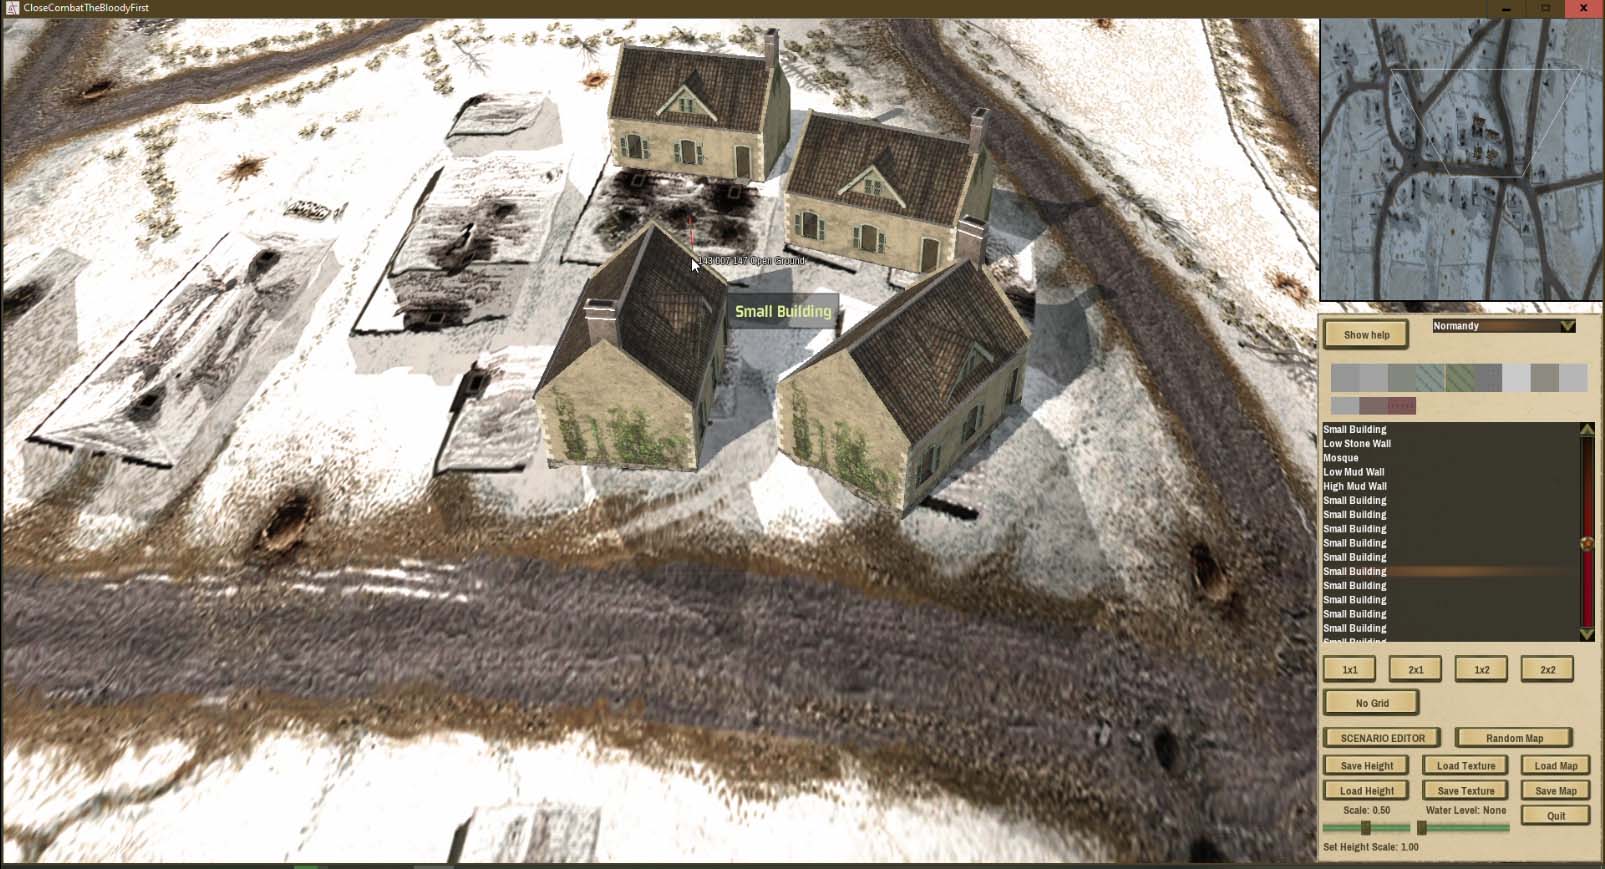
Now or even before I should save the map. It will prevent me from to lose the changes.
Next I can start adding objects, painting the terrain and more. It is very simple.
*Step14.
When I have the map with the objects and more, I can open the scenario editor where I can create a battle with this new map.
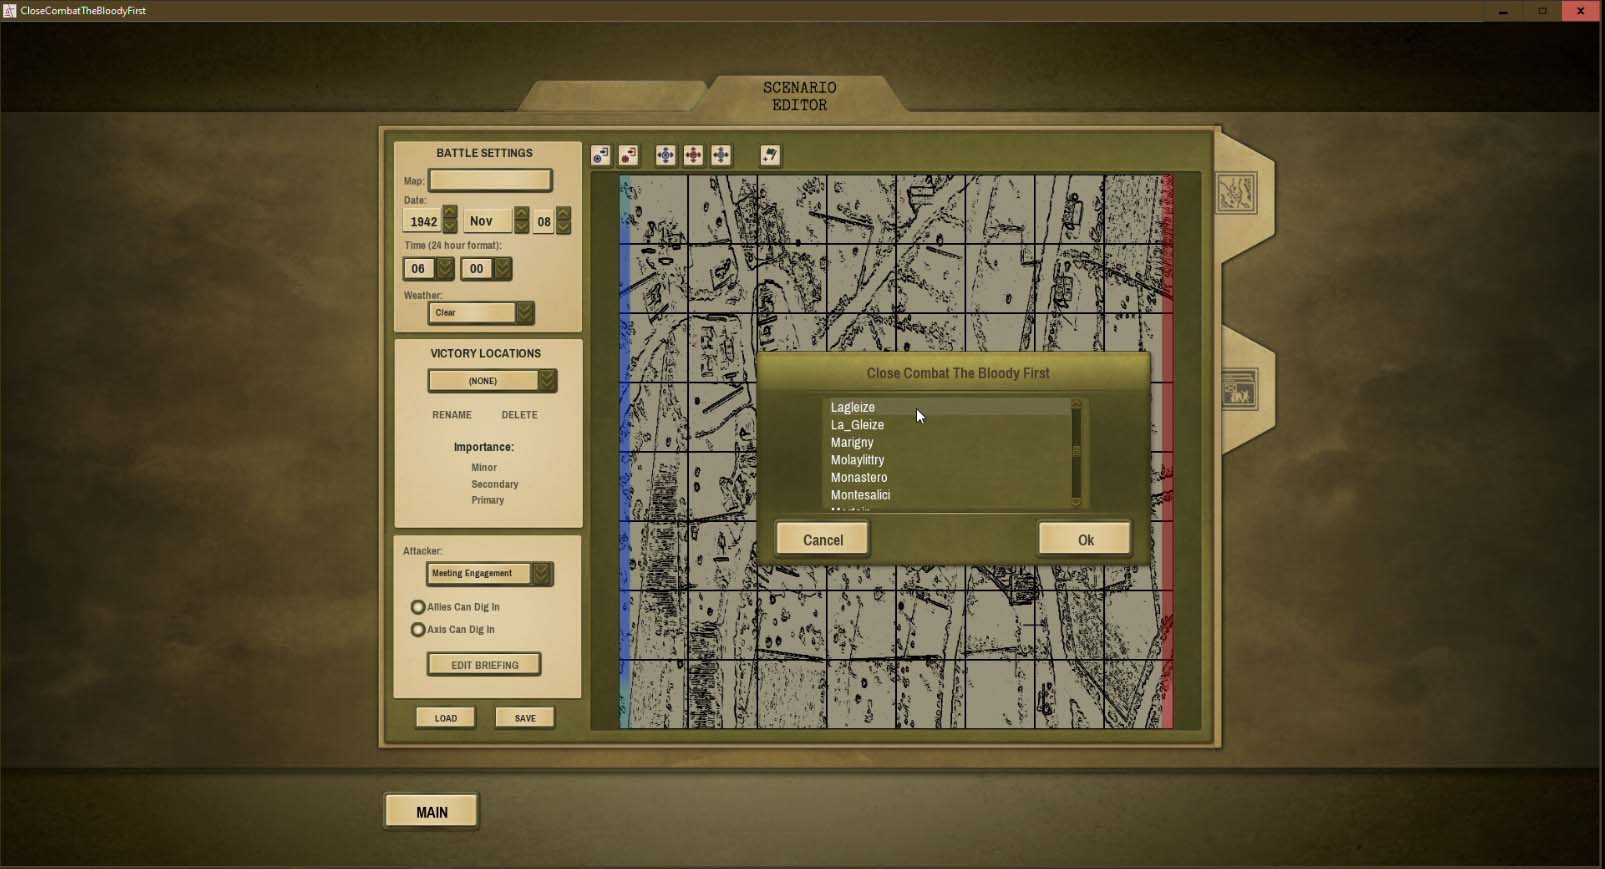
When I save the new scenario and I give by finished the edition from the map inside the map editor (I can edit the map without to change the scenario), I can put the scenario and the map inside the folder \My Games\CloseCombatTheBloodyFirst\Maps\ folder and the game will recognize it.
This is it, 14 easy steps where you can import a older CC map in the TBF. If you want more perfection, you can edit and remove the shadows, buildings and more from the old background. It is your choice.
Get in your computer the old 5CC tool made by Mafi. You can find it here. firefoxccmods.com/wp/download/close-combat-5cc-tool/ and uncompress in one folder from your computer it.
*Step2.
Open the tool by double click in the 5CC v1.22 (W2K-W7).exe inside 5CC_for_WinXP-W7 folder if your O.S is Windows. There is another for MAC users.
*Step3.
Open a TXT map file from a older CC game clicking here.

*Step4.
With the map opened in 5CC select the export background picture option.

It will let you save a bmp image from the background.

*Step5.
Open the bmp image from the background with photoshop. Now because the background scale in TBF is different, you must rescale the background image. Yes, increasing the size can reduce the quality from a image but these bmp images are not compressed images and it will not be a big lose of quality.
The selection from the size is very important. A map more as a box can be set in a size from 4096x4096. This map background from Lagleize map is more as a rectangle and I go to use a 8192x4096 size.

*Step6.
Next you must save it as a DDS file. You should have installed the Photoshop Nvidia DDS Plugin plugin or any other tool creating DDS image files. There are some tools which they let you to create a dds file from a normal image.

The DDS should be created with the TBF Nvidia DDS profile (check the TBF faq) and being a file from a very high size, it will require some of time saving it.
*Step7.
Again with the 5CC tool, we export the height greyscale image from the original CC map and we can close the 5CC tool because we do not need anymore in this process.

Remember where you saved these image files.

*Step8.
We open the TBF map editor, we will find the link in the launch screen. Inside the map editor, there is a help with some info about keys and with the esc key, we can access the options and change the resolution. Probably you must leave and launch again the map editor if you want change the resolution.
*Step9.
We load our new background image. The preset from tunisia, sicily or normandy affects to things as elevations. I am not sure if it affects to more things, probably yes. The modding help docs.google.com/document/d/1ZjsmoAmFBgiQAC3aCr3J6yhiH6OmbNDljWsiSXX_CSw/edit says this.
Custom Map Textures
Any custom textures for a map should be in the same folder as the map file. Most file formats are loadable, but TGA, BMP, and DDS are explicitly supported. Any normal map should have the same extension as the custom texture and the name should have a _NORMALMAP postfix. Note that DDS files will be preferred when loading and you do not need to alter the map file if you re-encode a file to be a DDS file as the code will automatically attempt to find a .DDS version of any file before loading the explicit extension.
Any custom textures for a map should be in the same folder as the map file. Most file formats are loadable, but TGA, BMP, and DDS are explicitly supported. Any normal map should have the same extension as the custom texture and the name should have a _NORMALMAP postfix. Note that DDS files will be preferred when loading and you do not need to alter the map file if you re-encode a file to be a DDS file as the code will automatically attempt to find a .DDS version of any file before loading the explicit extension.
While it does not change, the files from the maps must be in the original maps folder ..\Close Combat - The Bloody First\Campaigns\MAIN\DATA\MAPS\.. or the scenario editor and the game will not load them.

*Step10.
With the background texture loaded inside the map editor. We click in save the height map. By unknown reason for me, the height image has a different size with each map, the unique way where we can know what is the correct size or the easier way, it is create the default empty image. Next we open it in photoshop or other image editor and we check the size. With this map, it is 257x257 pixels. Now we can open the height from the original old CC map and resize to this size. Next we save it as a bmp image 32bits.

*Step11.
We load the previously saved height image with the map editor. When you make it, you will see some like this. For this map as I said before, I choose the normandy preset because the height settings are better.

*Step12.
Now I need set a different height scale, I do not need to change the water level because the map has not a river, a lake or other thing. I have choosen a 0.50 level and I load again the height image. It will update the height showing the last selected.

*Step13.
Now or even before I should save the map. It will prevent me from to lose the changes.
Next I can start adding objects, painting the terrain and more. It is very simple.

*Step14.
When I have the map with the objects and more, I can open the scenario editor where I can create a battle with this new map.

When I save the new scenario and I give by finished the edition from the map inside the map editor (I can edit the map without to change the scenario), I can put the scenario and the map inside the folder \My Games\CloseCombatTheBloodyFirst\Maps\ folder and the game will recognize it.
This is it, 14 easy steps where you can import a older CC map in the TBF. If you want more perfection, you can edit and remove the shadows, buildings and more from the old background. It is your choice.


